
As
I started collecting makeup, my brushes were stored in a small bin that I kept
on top of my makeup table. I soon realized that I wanted them to look nicer and
instead of having them just lay in a bin and get dusty, and possibly a higher
risk of infection, I made my own makeup brush holders. Most of the supplies are
right from the dollar store and cost little to nothing.

You
will need:
1
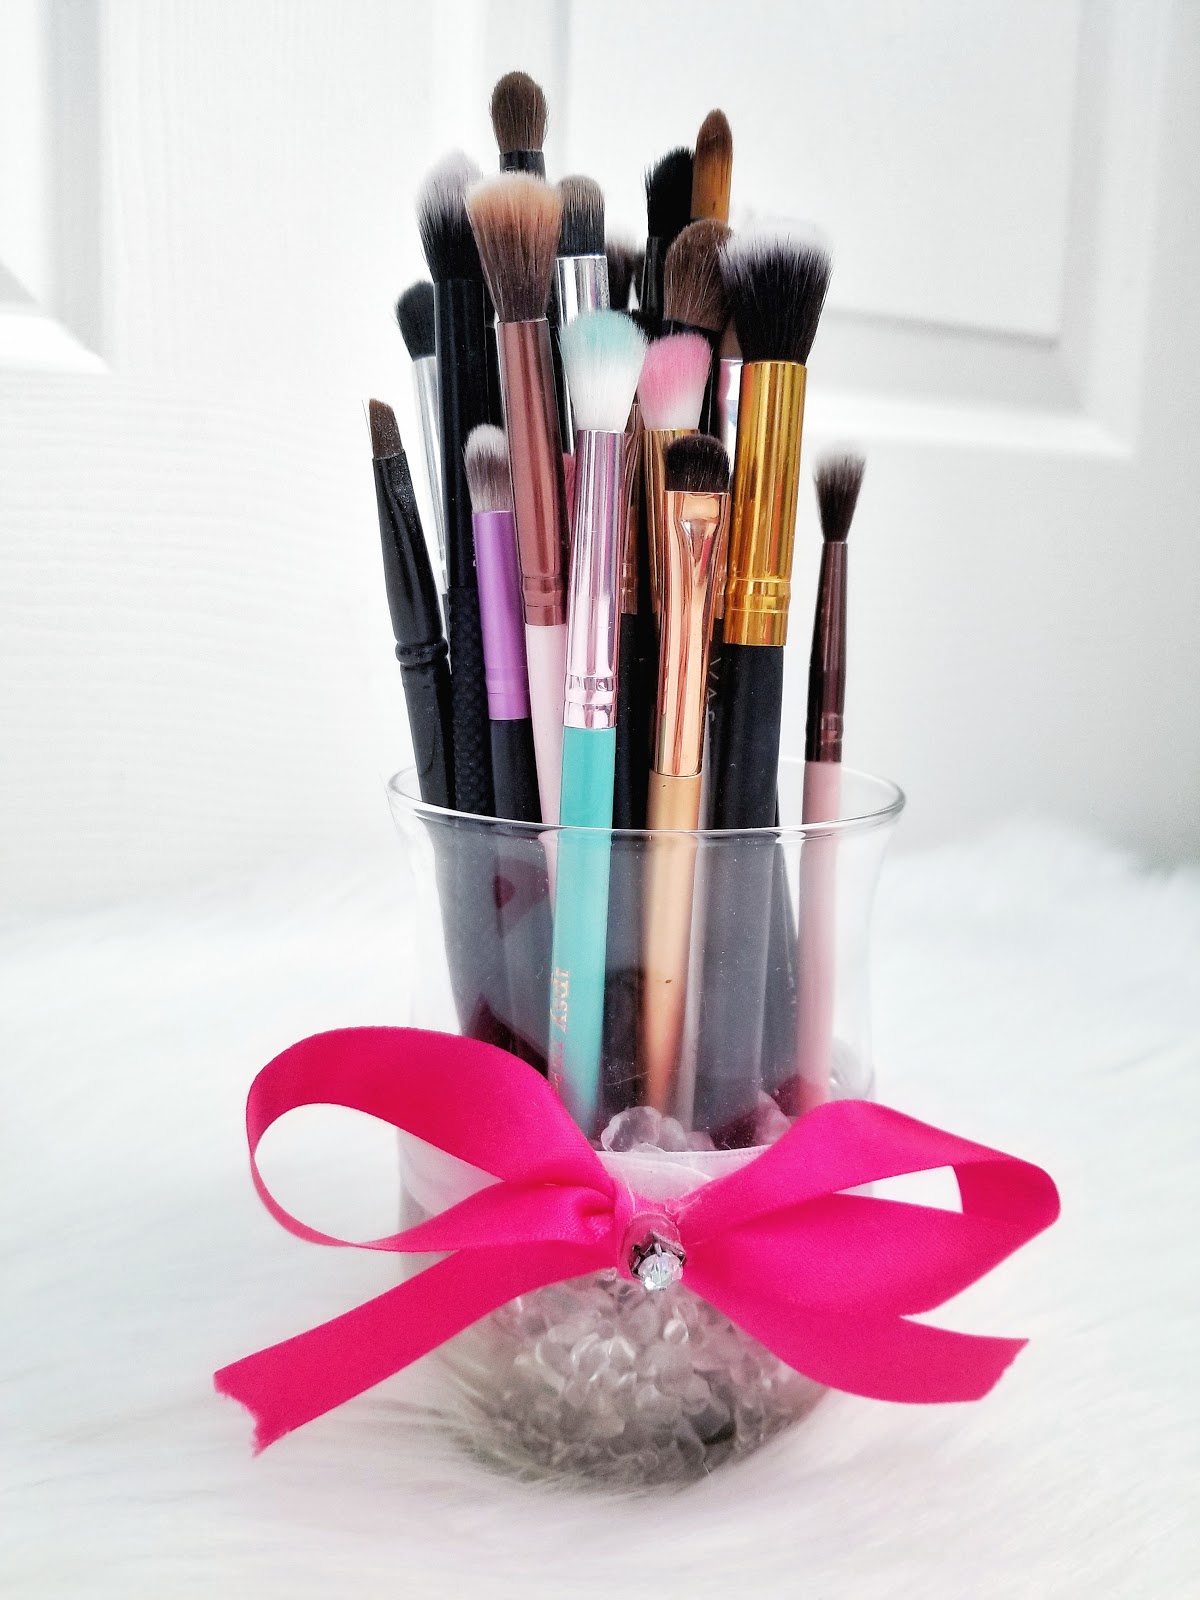
candle holder. I think this one would be perfect. You can also use this one that is more open or even a square one. Just keep in mind how long your brushes are and how long the container is. I know the square one is quite short in height so if you have tall brushes, I wouldn't recommend getting that one.
1
bag of filler. You can use this Ashland Diamond Filler from Michael’s or the Colorful Mini Decorative Accent Pebbles from the Dollar Tree. You can fill your brush holder with anything you want or not fill it at all. It's up to you.
Couple spools of ribbon in the color of your choosing. I chose white and pink but you can chose whatever colors work best for you.
A
hot glue gun
Decorations such as Ashland™ Diamond Acrylic Fillers. I cut up a bracelet and put it as a bead in the middle
Optional: Candle stick holder to give height to your brushes. I did this for one of mine, that is square shaped, and I ended up using it as my q-tip holder, instead of a brush holder.
What to do:
2. Take your ribbon and measure it once and glue it around the middle of your candle holder.
3. (Optional) Measure about 10 inches (give or take) of a different colored ribbon and make a bow. Glue your bow to the ribbon already on the candle holder.
4. Glue your decorations to your ribbon. I chose 1 diamond bead in the middle. You can make yours all around or just in the center, how I did.
5. (Optional) Glue your candle stick holder to the bottom. If you plan on having many brushes in one, I don’t recommend putting is underneath but it’s up to you.
6. Put your filler in your candle holder and fill your brushes!
No comments:
Post a Comment